
Toilet Not Flushing Problems
Toilet not flushing problem can be messy, frustrating, and embarrassing. If you’ve been dealing with this issue, you may be wondering why it’s happening. The truth is that there are several different reasons why a toilet may stop flushing.
Some clogged toilet issues you may be able to troubleshoot yourself but, working with a professional is the best way to ensure your toilet gets fixed without further damage. Meddling with the plumbing of your bathroom without the proper knowledge could worsen the problem as opposed to solving it. Problems with the Toilet Itself
Clog in the Toilet Trap
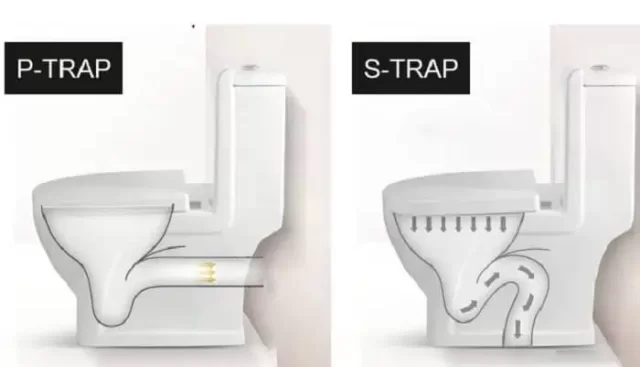
Your toilet, much like all of your other plumbing fixtures which have a drain, include a trap to assist in preventing sewer gases from entering your home. The trap does so buy "trapping" water which provides a barrier between your home and the sewer drain line. The most common traps in your plumbing are P-Trap and S-Trap. Most common toilets today are designed with a S-Trap which drain down into the floor where the main sewer line connection is made (see image above).
Most Common Toilet Flush Problems: Clogged Trap
Your trap can get clogged if you attempt to flush too much down the toilet at once. A clogged trap will often be a cause of flushing long items that may not travel through the s-trap easily or even heavy and bulky material which will hang at the corner\turn of the s-trap. Although annoying and often frustrating to you, a clogged trap can be easily cleaned and unclogged using the proper toilet plunger.
Reasons Why Your Toilet Trap is Clogged
Flushing Too Much Toilet Paper
As previously mentioned, a major complication with toilet flushing problems is using too much toilet paper.
Yes, flushing your toilet paper is a normal practice throughout the United States. But it can still cause flushing problems. Huge wads of toilet paper struggle to dissolve and can thus stop the toilet from flushing. This single issue can cause a lot of other toilet drain problems or even worsen preexisting clogs or issues.
Some solution you can propose are instead throwing toilet tissue into the garbage can instead of down the toilet. Another idea is to use a brand of toilet paper that is single-ply so you don’t have to worry about your toilet trying to absorb multiple layers of toilet tissue. Lastly, you could add a bidet or water spritzer to help with cleaning so that you don’t need so much toilet paper.
You may not realize that even how you throw your toilet paper into the toilet is important, but it has been proven that if you crumple up toilet paper into a ball to dispose of it, you increase your risk of clogging your toilet. Try folding it instead! Folding helps you use less, and it helps the toilet flush it.
Trying to Flush Non-Flushable Items
This one may seem self-explanatory, however, it is highly important that you recognize the big problems that trying to dispose of non-flushable items can cause.
Attempting to flush items like facial tissue paper, toilet wipes, cigarettes, feminine products, etc. can cause your toilet to easily clog up and stop functioning properly.
One of the most dangerous things you could throw into your toilet drain is kitty litter. Firstly, it can introduce harmful chemicals and parasites into your water supply. Another issue that this causes is that the litter itself will absorb the water in your pipes and cause it to clog the pipes.
Simply follow the rule of common household knowledge: if it’s not toilet tissue, don’t throw it down your toilet.
The Toilet Vent is Blocked
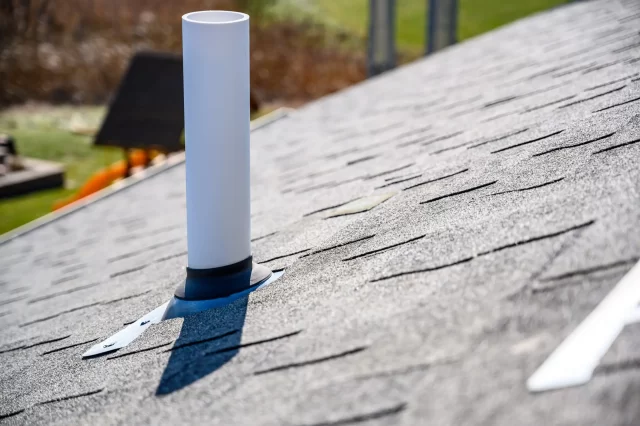
Toilet vents allow air in and out of your plumbing drain system to help drain flow by eliminating negative or positive pressure, in simp0le words, allowing for neutral gravity flow. You can better understand this science if you experiment with a straw. Let's assume that the straw is your drain line, now close the top of the straw and place it into a cup of water. The reason no water enters the straw is because there is nowhere for the air in the straw to escape to or vent. hence the water cannot replace the air in the straw. Same will happen if your plumbing vent is clogged. However, in some cases, the air in your plumbing drain line rather than escape through the vent, will escape through other drains connected to the line. This is where you may flush your toilet, tub or even your washing machine and hear gurgling sound from other plumbing drain.
Bubbling and Gurgling Sound from Drain
The bubbling or gurgling sound from a toilet drain or other plumbing drain is a sign of trapped air which is not venting the sewer or drain line properly. This could be due to a main-line stoppage (a clogged main line) which clogs the vent to plumbing system. Or a clogged plumbing vent.
Common Reasons for Clogged Vent:
- Leaves or Debris
- Rodents
- Construction Error
lastly, you can always count on your plumbing vent to exhaust sewer gases as they buildup in your sewer line.
Other Reasons Why Your Toilet Won’t Flush
Your toilet may not flush properly for several reasons, some detailed above. However, there are cases where the toilet and possibly other plumbing fixtures in your home may show similar drain problems. These symptoms usually indicate a main sewer line clog. A sewer line maybe partially constricted casing a slow drain or even a backup. Your home may have a single sewer line or a multi-branch sewer line system. If you are experiencing a whole house drain problem or a toilet flush problem along with other drains in your home, consider calling a professional plumber that is equipped with a powered sewer machine and sewer line inspection camera.
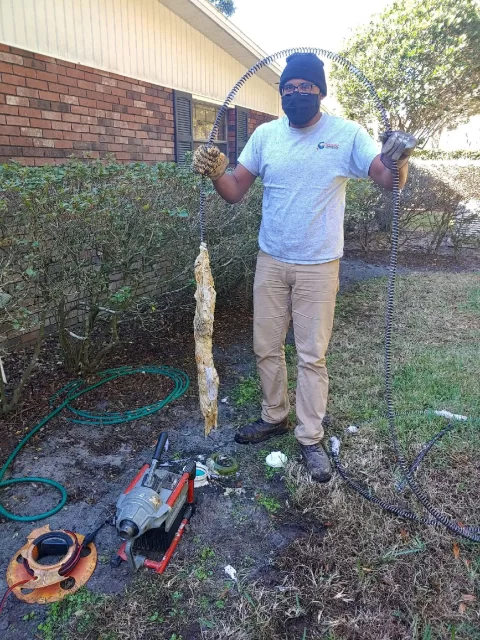
A Clog in the Sewer Line
This problem can cause major issues because it not only causes a clog within the sewer line itself but can also cause continued clogging in your toilet.
A clog in a sewer line is caused by items getting stuck within the sewer line itself and having the inability to properly drain out of the line. These clogs move through your pipes and get stuck within the sewer line.
These can also be caused by external issues. Some of the most common external causes of sewer line blockage are broken pipes in the sewer line, the penetration of external tree roots, and unfiltered materials infiltrating the system through a broken pipe.
If you suspect this issue is occurring, immediately call your plumber as it requires a unique skill set to fix.
DIY: Fixing A Running Toilet
Are you fed up with the sound of your running toilet? It not only wastes gallons of water per day, but also disrupts the peace of your house. Luckily, fixing a running toilet is an easy task, and can save you a considerable amount of money. In this article, we will provide you with a step-by-step instruction on how to DIY: Fixing A Running Toilet.
Easy DIY Toilet Flapper Replacement
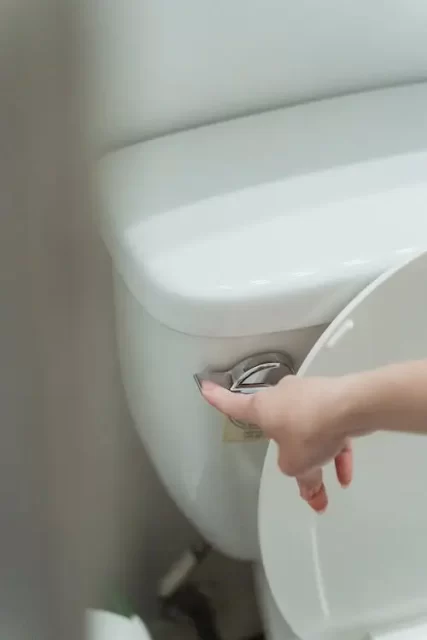
Step 1: Shut off the Water Supply
The first step in fixing a running toilet is to turn off the water supply. The water supply valve is typically located behind the toilet, near the floor. Turn the valve clockwise until you feel some resistance. This will prevent water from flowing into the tank while you work on the toilet.
Step 2: Remove the Tank Lid
After turning off the water supply, remove the tank lid and set it aside. Be sure to place it on a soft surface to avoid breaking it.
Step 3: Check the Flapper
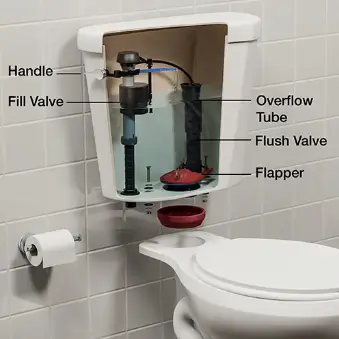
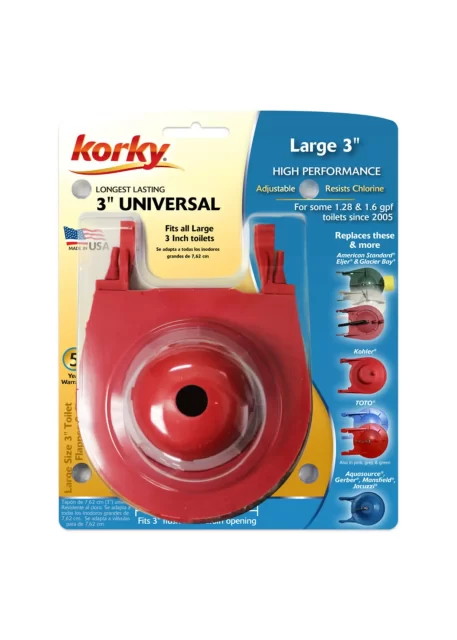
The flapper valve (see image above for replacement part) is what controls the water flow from the tank into the bowl. Sometimes, a running toilet is caused by a faulty flapper. Check the flapper for any cracks or damage. If the flapper is damaged, you will need to replace it.
Step 4: Check the Chain
The chain connects the flapper to the flush handle. Make sure the chain is properly connected to both the flapper and the handle. If the chain is too loose, it may prevent the flapper from sealing properly, causing the toilet to run.
NOTE:
If the flapper and chain are both functioning properly, the issue might be the water level in the tank. Make sure the water level is set to the manufacturer’s recommended level, which is usually marked on the inside of the tank. If the water level is too high, water will continuously flow into the overflow tube, causing the toilet to run.
If none of the above steps fixed the issue, it might be a faulty fill valve. The fill valve controls the water that enters the tank. To replace the fill valve, see easy steps and instructions below.
Easy DIY Toilet Fill Valve Replacement
Are you experiencing low water pressure in your toilet? Or perhaps you hear a hissing sound coming from the tank? These are signs that your toilet fill valve may need to be replaced. Fear not, replacing a toilet fill valve is a quick and easy DIY job that you can do yourself! Follow these step-by-step instructions to get the task done in no time.
Materials You Will Need:
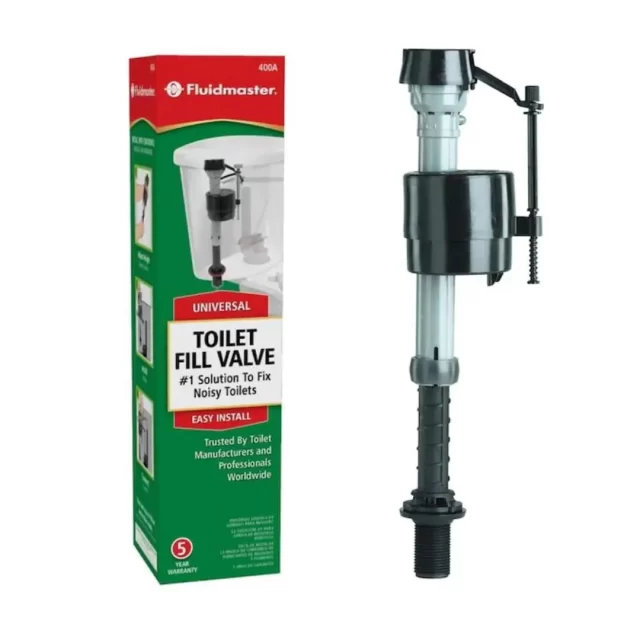
- Replacement fill valve (image above)
- Wrench or adjustable pliers
- Towel or rag
- Bucket
- Teflon tape (optional)
Step 1: Turn Off the Water Supply
First and foremost, turn off the water supply to your toilet. Look for the valve typically located behind the toilet at the base of the wall and turn it clockwise all the way until it stops. Afterward, flush your toilet to drain the water from the tank and the bowl.
Step 2: Remove the Old Fill Valve
Use a wrench or adjustable pliers to detach the old fill valve from the water supply line. Next, loosen the mounting nut from the bottom of the tank and remove the old fill valve from the tank.
Step 3: Install the New Fill Valve
Attach the new fill valve to the mounting nut and hand-tighten it. Be sure to attach the water supply line to the new fill valve and tighten it with your wrench or pliers.
Step 4: Adjust the Height of the New Fill Valve
Before installing the new fill valve, adjust the height. The water level should be about an inch below the overflow tube. You can adjust the height of the new fill valve using a screwdriver or by following the instructions provided with the new fill valve.
Step 5: Turn On the Water Supply
Once the new fill valve is installed and adjusted to the correct water level, turn the water supply back on by twisting the valve counterclockwise. Allow the tank to refill and check to make sure there are no leaks.
Step 6: Perform a Test Run
Finally, test your toilet by flushing it. Listen and make sure the new fill valve is filling the tank and bowl with enough water. If the water level is too low or too high, adjust the height of the fill valve accordingly until the tank fills to the right level.
Now you have successfully replaced your toilet's fill valve, and you've saved money by doing it yourself.
Toilet Repair in Orlando
Are you struggling with a toilet flushing issue? If you’ve been flushing anything other than toilet paper, then stop doing so immediately. However, other toilet flushing problems may be more nuanced, and that’s where we can help!
If you are concerned about your toilet, or any other water system in your home or business, it is never a bad idea to call a professional and get their opinion.
If you need a reliable plumbing service and want professionals with years of experience and expertise, check out Choice Plumbing Orlando today to see how we can assist you and all your plumbing needs near Orlando, FL